08: Laparoscopic and Robotic Applications
This chapter will take approximately 17 minutes to read.
Short History of Laparoscopic and Robotic Applications in Pediatric Urology
Laparoscopy and robotic-assisted laparoscopy are parts of minimally invasive surgery which have been more and more popular in the world. The history of laparoscopy dates to 1805, when Bozzini developed the first cystoscope. The term of laparoscopy (“laparothorakoskopie”) was created by Swedish surgeon Hans Christian Jacobaeus in 1901. He reported 17 laparoscopy cases and 2 thoracoscopies in the same year.1 Early laparoscopy had many limitations and raised more concerns for the significant increase in complication rates.
Video technique was developing in 1960s which helps surgeons to watch the operative field on a monitor. The first case of laparoscopic technique in pediatric urology was for non-palpable undescended testes, which was reported in 1976.2 During 1970s and 1980s, laparoscopy was only widespread acceptance for diagnostic purposes among pediatric urologists. The next phase of operative laparoscopic surgery was in 1990s when more complex laparoscopic procedures began to emerge following the adult surgery practice. In 1993, Kavoussi described the first laparoscopic pyeloplasty in 24 year old female. Two years later, Craig Peters reported the first dismembered laparoscopic pyeloplasty for a right ureteropelvic junction obstruction in a boy.3 Laparoscopic pyeloplasty has significantly decreased length of stay and improved postoperative pain control. Since then, several companies like Karl Storz Endocsopy, Richard Wolf started work with pediatric urologists to develop, and improve laparoscopic instruments.
Over the past several decades, laparoscopic surgery has become an important part of pediatric urological practice. In some cases, it has replaced conventional open surgery and in several cases is recognized as the gold standard approach. Laparoscopic surgery has comparable results, while also decreasing the surgical incisions to 3-mm and 5-mm port sites. For the scarless goal, even natural orifice transluminal endoscopic surgery (NOTES) and single-site laparoscopic surgery are possible and practiced in some centers.4
In 2000, FDA approved a robotic surgical system named da Vinci Surgical System developed by Intuitive Surgical. It is designed to facilitate laparoscopic surgery and controlled by a surgeon from a console in the operating room. It has advantages of a stable, magnified 3D view, tremor filtering and motion scaling for precise intracorporeal exposure and suturing. In the past two decades, robotic-assisted surgery has been commonly used in urology, gynecology, general surgery and pediatric surgery. Da Vinci surgical system has progressed from the first generation S model to the Si and most recently, the Xi and the single-port SP system.
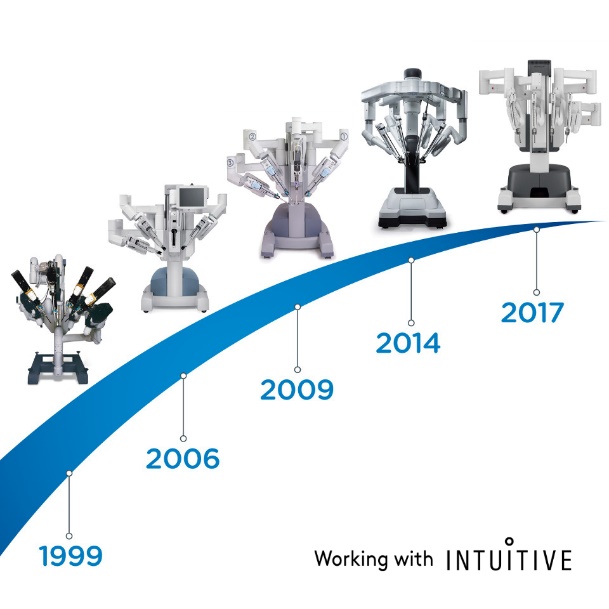
Figure 1 The evolution of da Vinci Surgical System
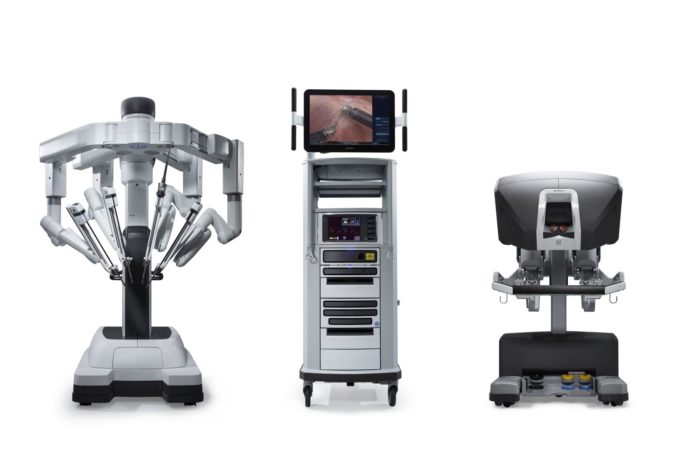
Figure 2 da Vinci Xi Surgical System
In 2001, Meininger reported the first case of robotic-assisted Nissen fundoplicaion in a pediatric patient.5 This work inspired the advancement of pediatric surgery. Robotic-assisted laparoscopic pyeloplasty (RALP) was the first surgery performed with da Vinci platform in pediatric urological field reported by Olsen and Jorgensen in 2004.6 In 2005, Atug described their experience about RALP for seven pediatric patients range from 6 to 15 years.7 In 2006, Lee compared the results of RALP and open pyeloplasty (OP) by matching their age and sex with 33 patients.8 They found that mean operative time was 219 minutes in RALP group while only 181 minutes in open procedure group. Operative time of RALP decreased significantly after 15 cases. RALP cohort demonstrated a shorter length of stay, lower pain medication requirement, and the success rate was 93.9%.9 Given the high success rate and low complication of RALP, some urologists have expanded this approach on infants. Recently, Andolfi released their RALP infant case series and demonstrated that RALP is an appealing management option for UPJO in infants as it has successful outcomes, benefits of decrease length of hospital stay and improved cosmesis.10 Higganbotham team even performed the robotic-assisted laparoscopic orchiopexy for a bilateral undescended testes boy.11
Nowadays, laparoscopic orchiopexy, laparoscopic high-ligation with the processus vaginalis have been routine treatment around the world. Robotic-assisted laparoscopic surgery have also been widespread in the US, European and Asia. Many other companies have tried to develop surgical robot systems to challenge the dominance of da Vinci Surgical Systems. These include Senhance surgical system from TransEnterix, Single Port Orifce Robotic Technology (SPORT) from Titan Medical, Hinotori Surgical Robot System from Medicaroid, REVO‑I Robotic Surgical System from Meere Company, Edge surgical system from Edge Medical Robotics and so on. Tens of robotic surgical system are still in the process of developing.12 The demand for robotic-assisted surgery is still increasing. New technologies could enhance the minimally-invasive efforts and improve the capabilities of previously established systems. Future studies are needed to further evaluate the strengths and weaknesses of each robotic surgical device and platform in the operating suite.13
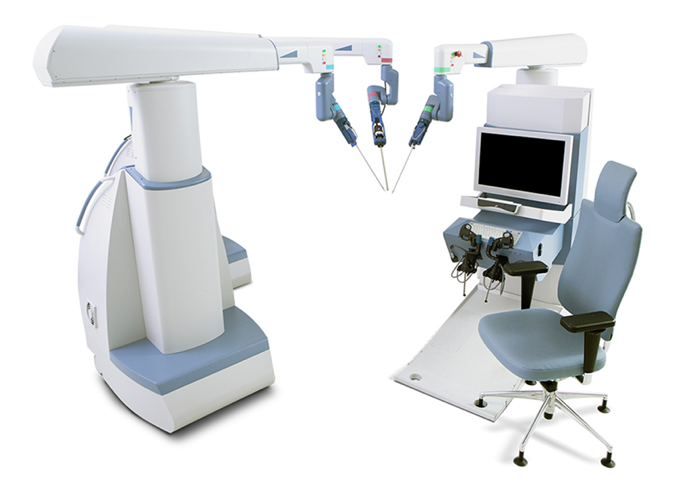
Figure 3 Senhance Surgical System
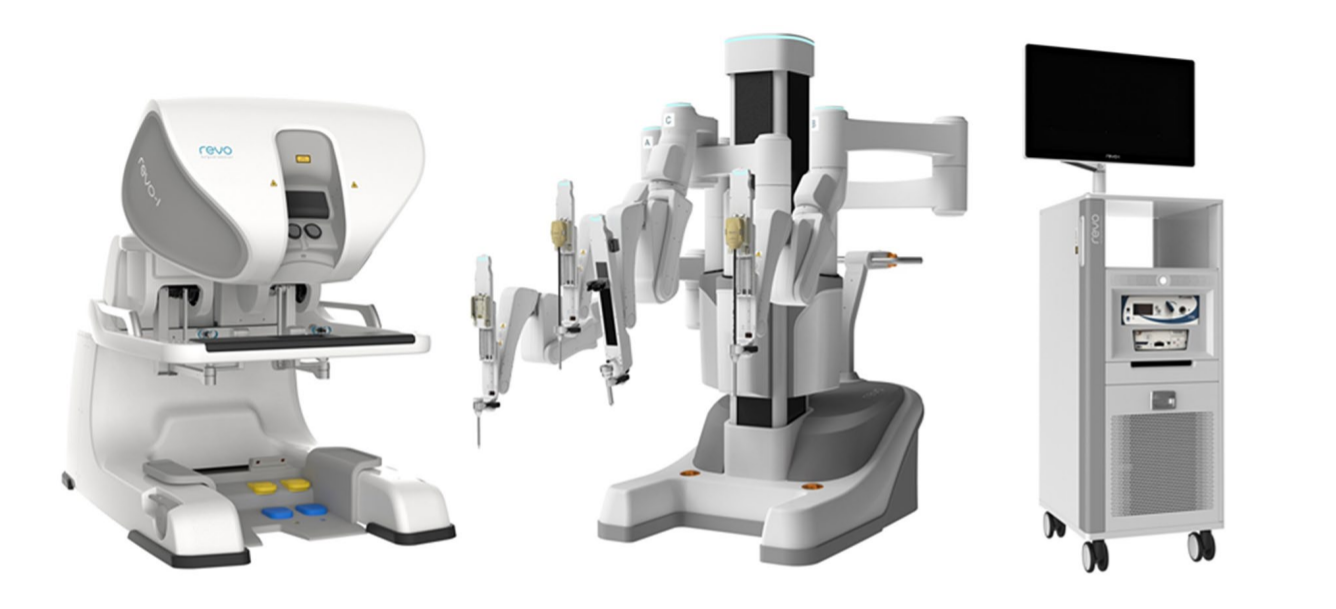
Figure 4 REVO-I Robot System
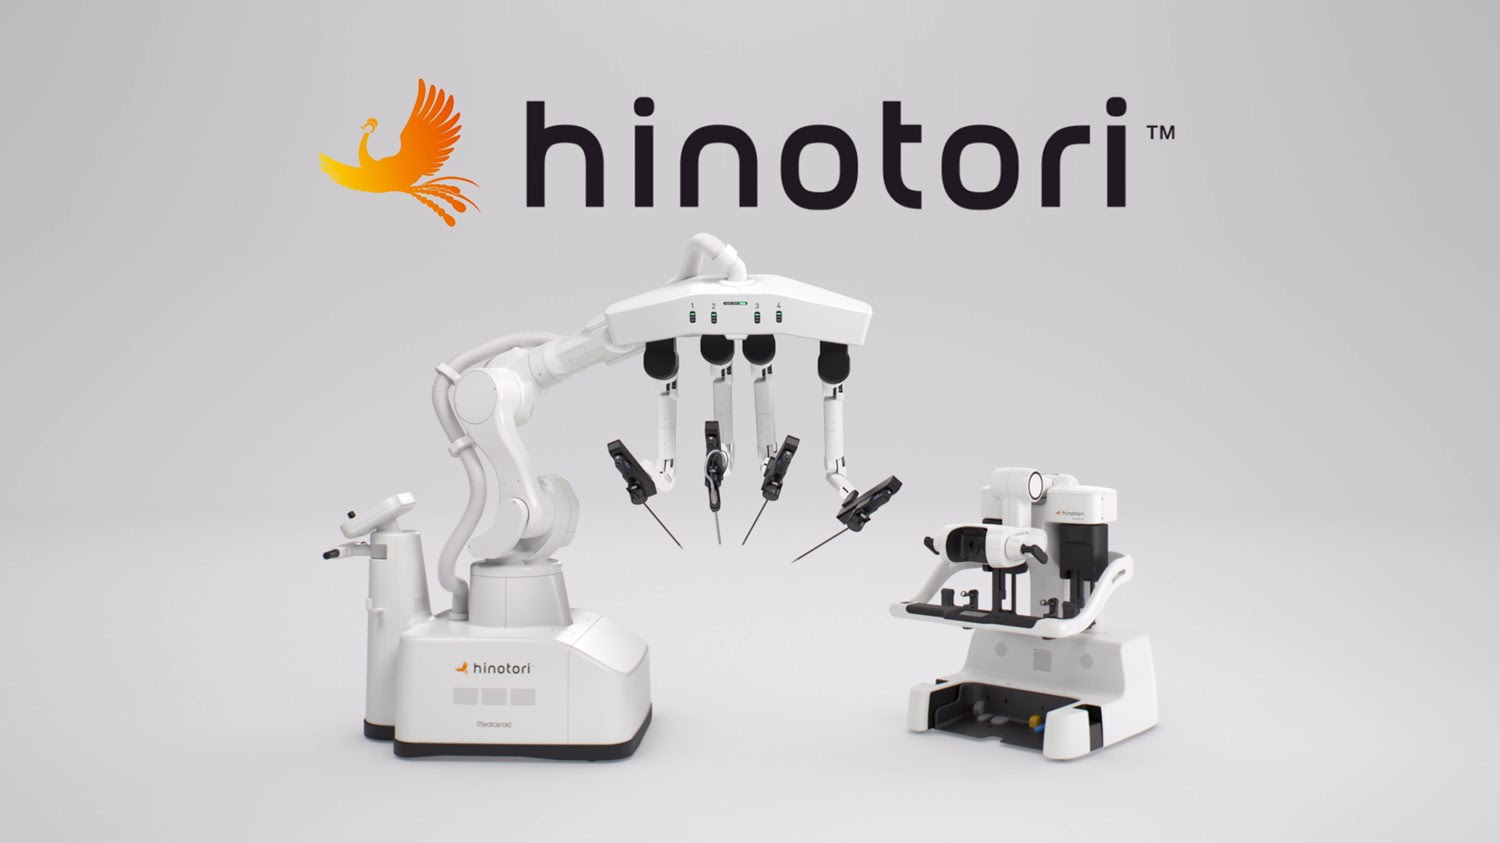
Figure 5 Hinotori Robot System
Instruments of Laparoscopic and Robotic Applications
Instrumentation of Pediatric Urological Laparoscopic Surgery
Pneumoperitoneum Equipment
Pneumoperitoneum equipment consists of pneumoperitoneum machine, CO2 cylinder, gas output pipeline and puncture instruments. The pneumoperitoneum machine can regulate the pneumoperitoneum pressure (6–10 mm Hg) and gas flow. The current pneumoperitoneum machine can automatically adjust the intra-abdominal pressure, quickly inject gas, and monitor the CO2 consumption, and is equipped with alarm devices for insufficient CO2 pressure in the cylinder or intra-abdominal pressure exceeding the preset range, so that the surgeon can timely detect any issues, which improves the safety of the operation. Modern pneumoperitoneum machines (Figure 6) can achieve: ① Automatic circulation to filter out smoke to ensure a clear surgical field of view; ② Real-time monitoring of pneumoperitoneum pressure to ensure constant pneumoperitoneum pressure; ③ Some pneumoperitoneum inflatable equipment has a gas heating system to avoid the decline in patient body temperature. ④ Eliminate smoke emissions into the operating room, to ensure the health of surgeons and nurses.
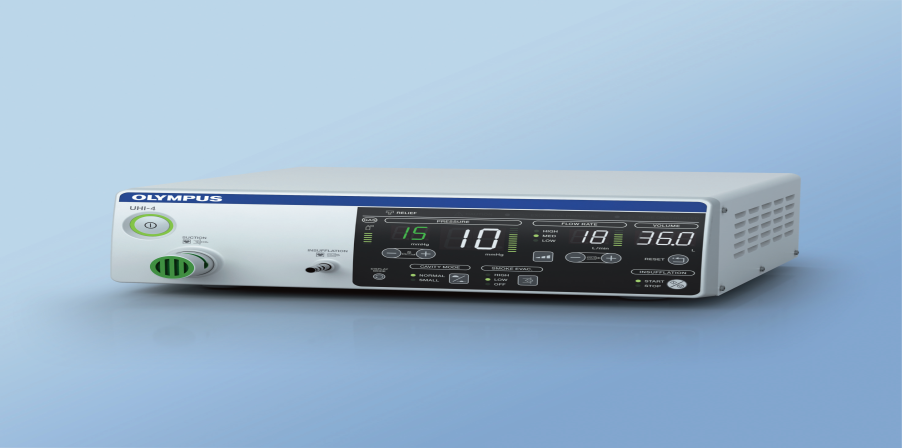
Figure 6 Modern pneumoperitoneum machine
Power Cart
Power cart (Figure 7) unifies the monitor, pneumoperitoneum machine, camera system, light source system, and electric knife into one trolley, which is convenient to push, easy for the operator to change the position at any time.
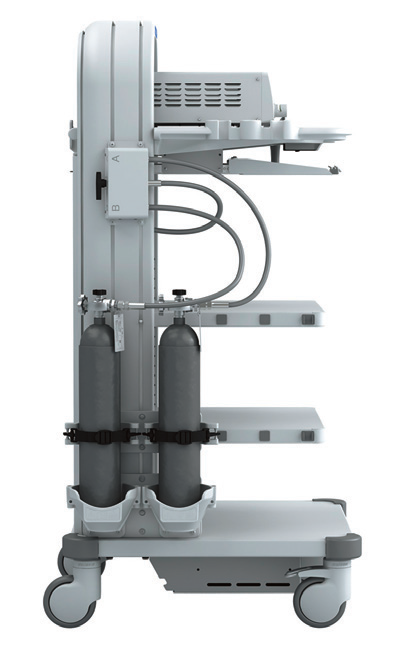
Figure 7 Power Cart
Optical System
Currently, laparoscopes mostly use columnar mirrors with good light conduction, undistorted images, flat images, ultra-wide angles, uniform brightness, long depth of field, and strong stereoscopic sensation. The diameter is 5–10 mm, the working length is 31 cm, and the field of view is 0˚, 30˚ and 45˚ (Figure 8). The 30˚ laparoscope with a diameter of 5 mm is most common used laparoscope in pediatric urology, which has the advantages of changing the surgical field of view, reducing blind areas, allowing observation of the same structure from different angles, facilitating the formation of a three-dimensional impression by the surgeon, and reducing mutual interference between the laparoscope and instruments.
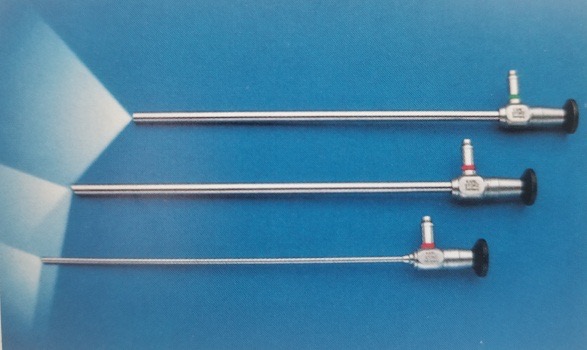
Figure 8 The 0°, 30° and 45° laparoscope.
Cold light source and optical fiber probe
A cool or cold light source (Figure 7) providers equal proportions of red, blue, and green wavelength light to create white light and is the most common type of light used in laparoscopic surgery. Many devices currently use a xenon lamp (300 W) or xenon lamp with LED technology coupled with automatic adjustment of brightness to provide a reliable source of light source during surgery. The average lamp life is up up to 3,000 hours. This type of light source is economical, durable, and efficient. The optical fiber probe in the lens (Figure 8) is composed of a bendable bundle of light-guide fibers with high quality light transmission. These can break with deflection or bending of the lens and require repair or replacement.
Camera System
The laparoscopic camera system (Figure 9) has evolved from standard definition to high definition to ultra-high definition, and most recently 4K camera systems. With resolution improving, it can bring clearer surgical views to the operator. 3D laparoscope technology is available currently, but is only available in 10 mm diameter, so it is less common in pediatric urology.
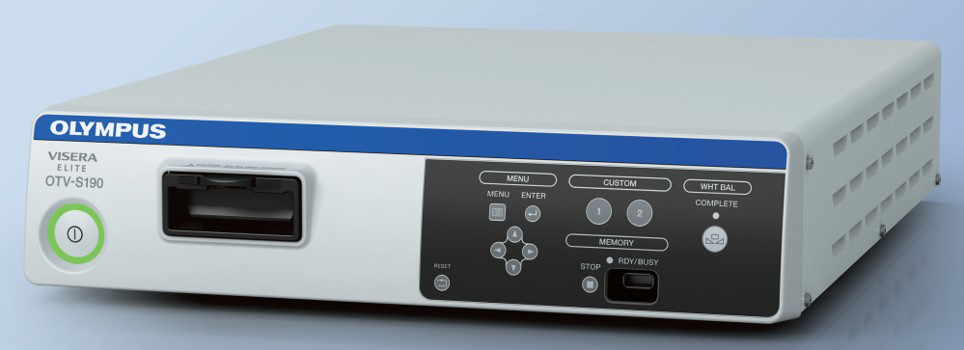
Figure 9 Laparoscopic camera system
Electrosurgical System
Included Electrodebrider and electrocoagulation system, ultrasonic knife (Harmonic scalpel), energy platform and Ligasure. These devices provide various energy types including monopolar electrocautery, bipolar electrocautery, ultrasonic energy, and combinations to aid surgeons (Figure 10, Figure 11, Figure 12, and Figure 13).
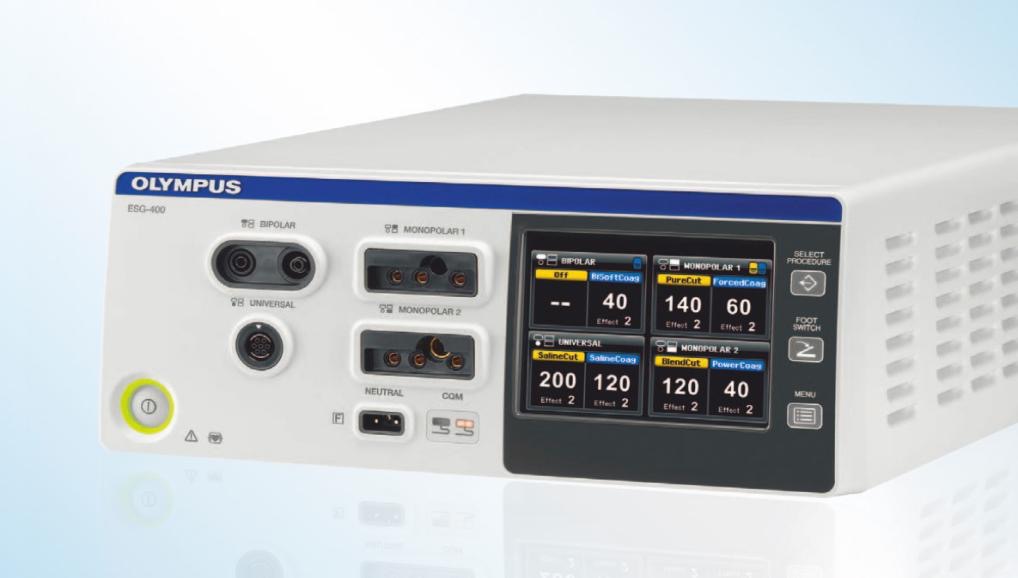
Figure 10 Electrical surgery unit
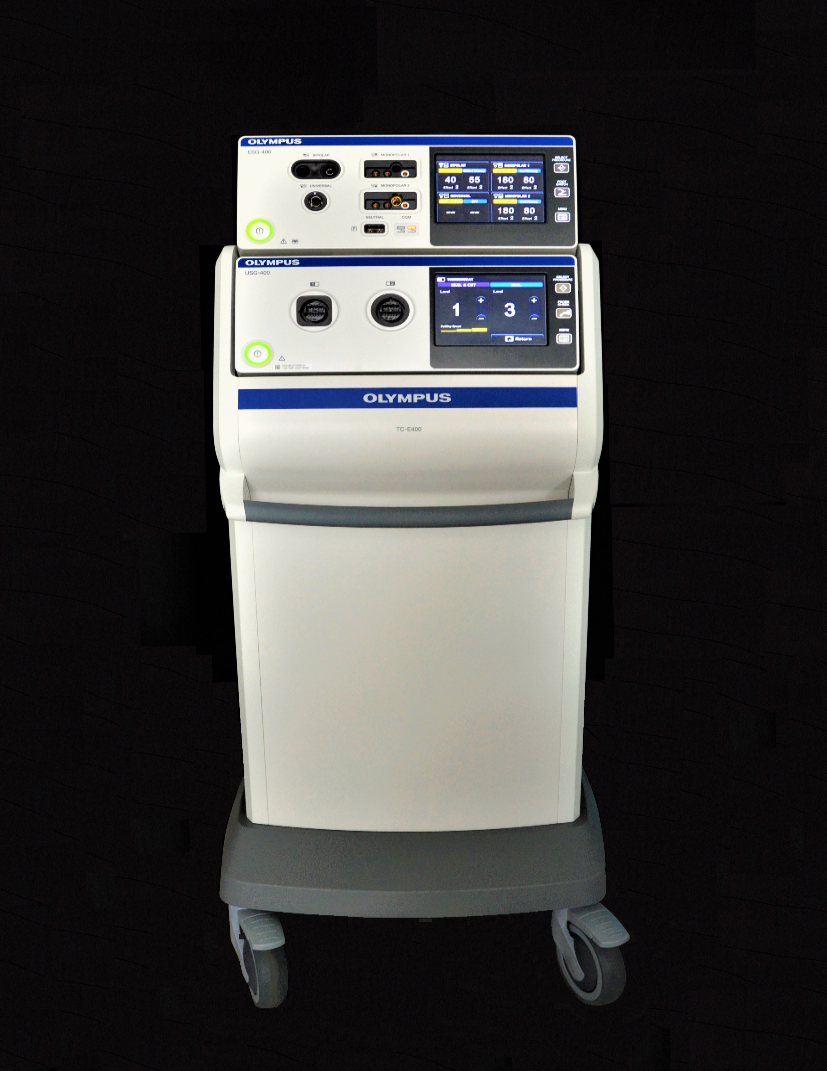
Figure 11 Ultrasonic knife
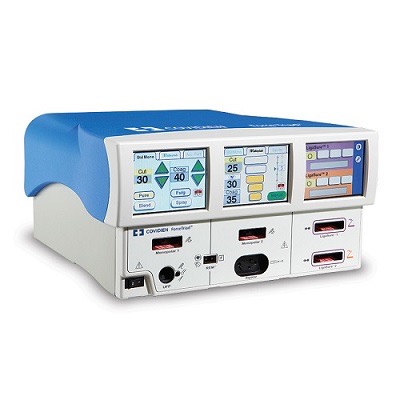
Figure 12 Energy platform
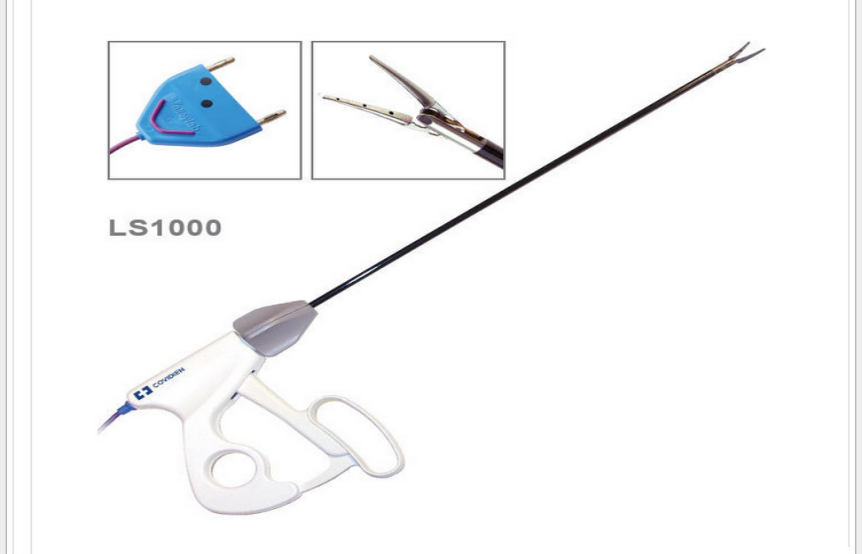
Figure 13 Ligasure
Other Instruments
Commonly used instruments consist of Veress needle, trocar, Hem-o-Lok clip appliers, titanium clip appliers, graspers, needle drivers, scissors, and more (Figure 14, Figure 15, Figure 16).
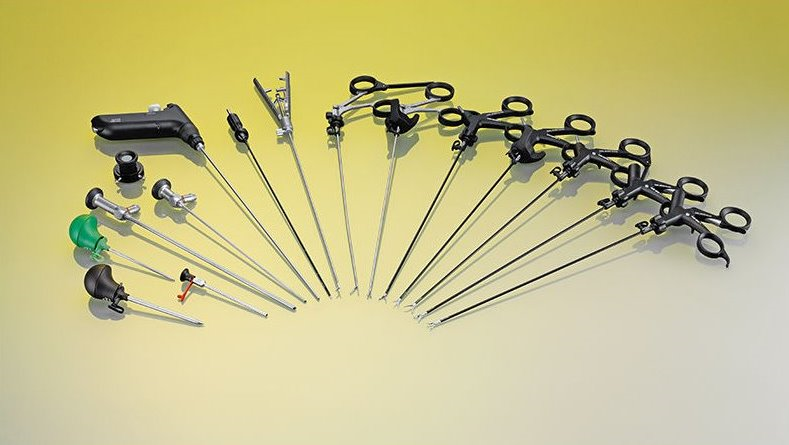
Figure 14 Common instruments
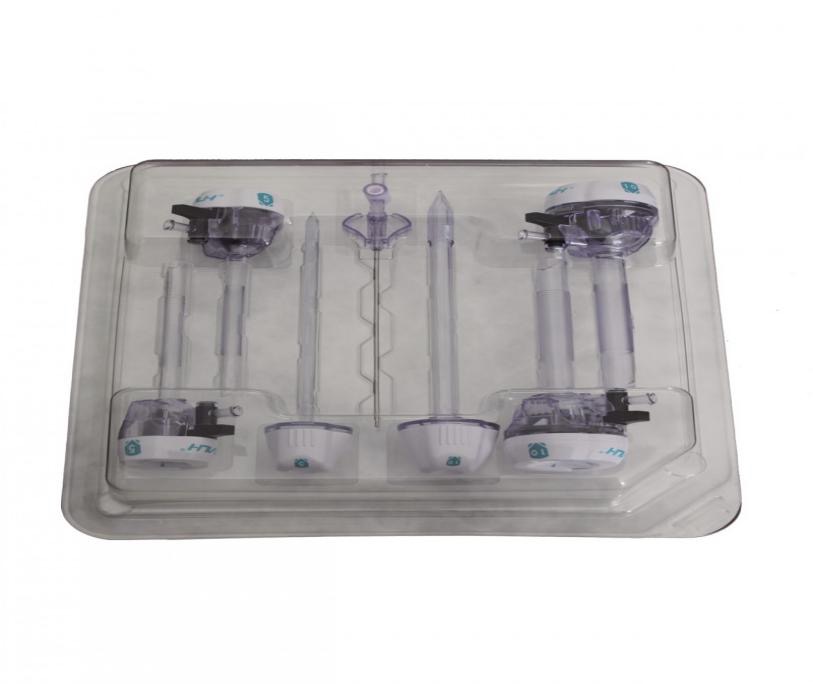
Figure 15 Trocar
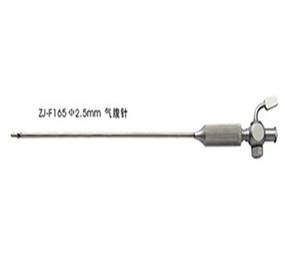
Figure 16 Veress needle
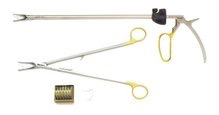
Figure 17 Hem-o-lok clip applier
Instrumentation of Da Vinci Robotic-Assisted Laparoscopic Surgery
The da Vinci surgical system is mainly composed of three parts: surgeon console, bedside robotic arm system (Patient Cart) and 3D imaging system (Vision Cart) as shown in Figure 18.
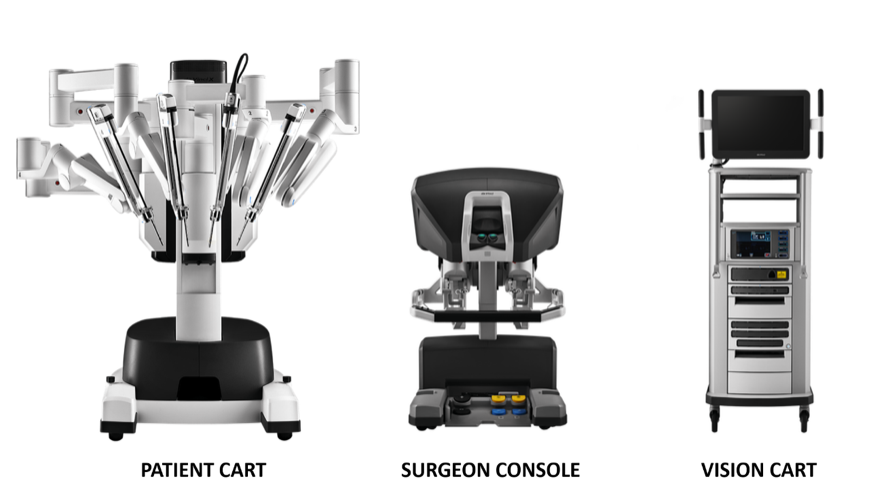
Figure 18 Three components that make up the da Vinci system
Surgery Console: This console can be placed outside the door of the sterile room of the operating room. It mainly relies on the hands and foot pedals of the surgeon to control the operating arm and the 3D high-definition endoscope.
Bedside robotic arm system (Patient Cart): This system is the operating part of the robot, which mainly provides support for the instrument arm and camera arm. It usually includes 2 to 3 operating arms, each of which is equipped with needle holders, scissors, graspers, etc. The positions can be interchanged according to intraoperative needs, and the number of mechanical arms can be increased or decreased.
3D imaging system (Vision Cart): The system has a built-in core processor and image processing equipment, which can be inserted into auxiliary surgical equipment (insufficiency system), and provides a three-dimensional image of the three-dimensional surgical field of vision with dual-channel signals to make the intraoperative vision more close to the visual effect of the naked eye. The vision car includes a pair of video camera controllers, a pair of light sources and left and right eye video signal synchronizers. The endoscopic camera contains dual lenses, and the images collected through the dual lenses form a 3D image under the action of the video signal synchronizer, which is helpful for the surgeon to identify the tissue relationship.
Commonly used equipment for children of da Vinci robot includes the following. Robotic trocar, consoles, patient tower. In addition to the 8 mm (Xi), 8.5 mm (Si) diameter working channel used by the endoscopic camera channel, the other operating channels use its 8 mm or 5 mm (Si) working channels. The special da Vinci robot system cannula is marked with a "two thin and one thick" marking line at the end of the abdominal cavity. The depth of insertion into the abdominal wall is shallower than that of a traditional laparoscope.
One-time-use sterile robotic arm set with an adapter. It is the "bridge" between the robotic arm and the surgical instrument.
Surgical instruments: Each surgical instrument is composed of three parts: disc, shaft, and wrist joint. Commonly used robotic surgical instruments in pediatric urology are divided into 8 mm surgical instruments and 5mm surgical instruments, including unipolar curved scissors, non-invasive forceps, large needle holder, perforated bipolar forceps, electrode electrosurgical knife, surgical curved scissors, needle holder, and harmonic scalpel (Xi). The EndoWrist articulation of instruments allows for precise control with ±90 degrees of articulation in the wrist, motion scaling, and hand tremor elimination. There are four degrees of freedom with standard laparoscopic instruments on two axes (moving inward, outward, clockwise, and counterclockwise).
Patient Positioning, Trocar Placement and Initial Access
Upper Urinary Tract Surgery
For laparoscopic upper urinary tract surgery, we usually select healthy side in the reclined supine position, with the affected side padded at 45˚ to 60˚, as close as possible to the edge of the bed at about 1 cm.
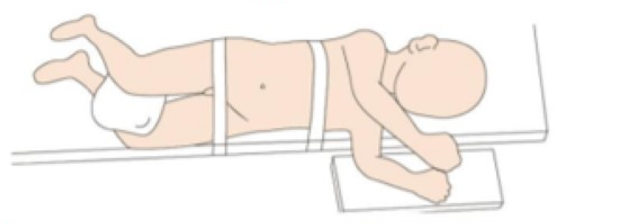
Figure 19 Laparoscopic upper urinary tract patient position
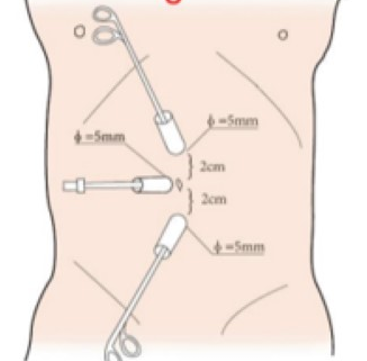
Figure 20 Laparoscopic upper urinary tract trocar position
For robotic-assisted laparoscopic upper urinary tract surgery patient position selection, we have four rules: firstly, the patient is positioned as kidney position to provide operation space and avoid the interference with robot arms. Secondly the patient is placed close to the edge of the table to decrease the distant with assistant. With the use of table rotation, we preferred 80˚ lateral decubitus position. Lastly, the temperature management in operation room is very important. Warm air machine and warm blankets should be used for infant surgery.
All ports were placed under direct vision included one 8.5 mm camera trocar, one 8-mm trocar and one 5-mm trocar. One or two additional assistant 3-mm trocars were placed at the lateral 3 cm of the midpoint of the Pfannenstiel line, to improve the efficient of the suture

Figure 21 Patient and trocar position for robotic-assisted laparoscopic upper urinary tract surgery
Lower Urinary Tract Surgery
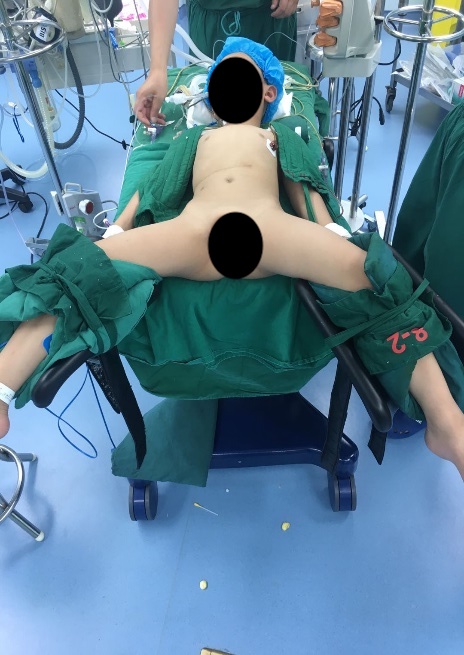
Figure 22 Modified lithotomy position for lower urinary tract surgery
For lower urinary tract surgery, both laparoscopic and robotic-assisted laparoscopic surgery, we employ modified lithotomy position with head down 30–45˚. Laparoscopic or robotic ports are placed including one camera trocar through umbilicus, and two additional trocars placed at umbilical level with 4–6 cm distance between them.
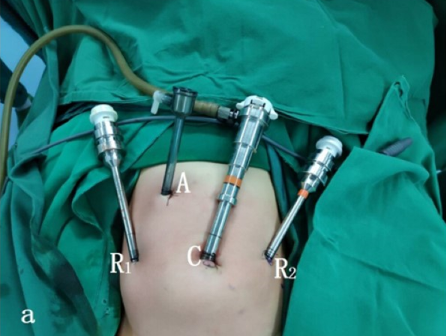
Figure 23 Trocar position for lower urinary tract surgery
Applications of Laparoscopic and Robotic Technique
Pyeloplasty
Well-established evidence has demonstrated that laparoscopic pyeloplasty or RALP not only has success rates equal to those of open pyeloplasty, but also has the advantages of minimal invasiveness, better cosmesis, less post-operative pain, decreased length of hospital stay, and early recovery. Anderson-Hynes dismembered pyeloplasty is gold standard for every approach.
Laparoscopic Pyeloplasty
For laparoscopic pyeloplasty, transperitoneal or retroperitoneal could both achieve satisfied surgical view. But for robotic-assisted surgery, the space of retroperitoneal is too small. So that we introduce both transperitoneal and retroperitoneal approach for laparoscopic pyeloplasty and transperitoneal approach for RALP.
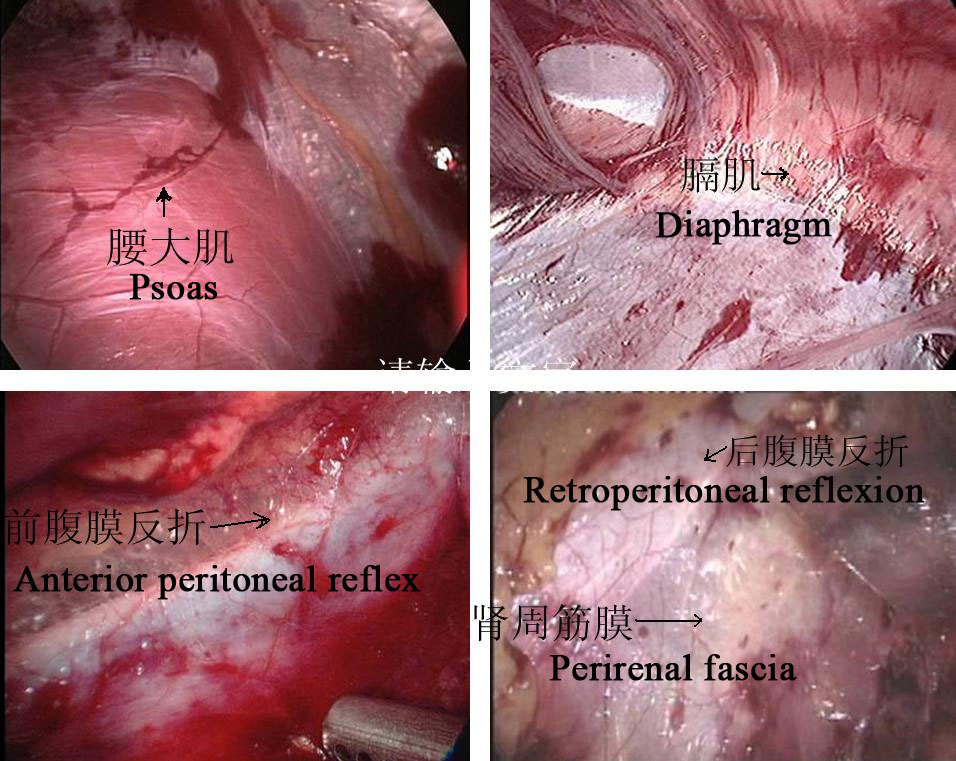
Figure 24 Retroperitoneal anatomical markers
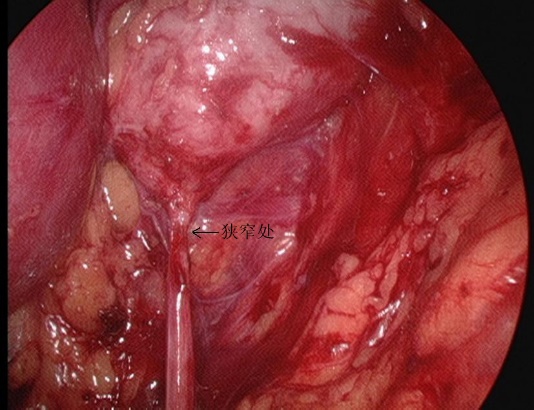
Figure 25 The stenosis part of UPJ from retroperitoneal view
Retroperitoneal Approach
- Longitudinal incise the skin 1.5–2.0 cm below the tip of the 12th rib in the posterior axillary line. The tendon membrane at the beginning of the transversus abdominis muscle and the lumbodorsal fascia are bluntly separated by vascular forceps to reach the perirenal area. A balloon is placed after blunt separation of the perirenal space by the index finger to create the retroperitoneal operating space, and the pneumoperitoneum pressure is maintained at 8–14 mmHg, with an average of 10 mm Hg.
- The perinephric fascia was cut longitudinally by ultrasonic knife to expose the dorsal aspect of the lower pole of the kidney, and the renal pelvis and upper ureter were separated to reveal the site and cause of stenosis. Separate the dorsal middle and lower pole of the kidney, free and fully expose the renal pelvis and upper ureter, clarify the UPJO.
- Cut the renal pelvis. Keep the medial part of the pelvis incompletely detached and still connected to the ureter, and split the ureter longitudinally until crossing the stenosis by 1.0 to 2.0 cm.
- Suture renal pelvis flap with the lowest point of the ureter together with 5-0 absorbable suture.
- Separation of the ureter at approximately 0.5 cm proximal to the stenotic segment and further completion of the renal pelvis cut to remove the UPJ stenotic segment and part of the dilated renal pelvis.
- Sequential suturing of the posterior wall of the anastomosis with 1 locking edge every 2 stitches
- Continued suturing of the excess renal pelvic flap opening without cutting the sutures
- Placement of a double J stent in line through the anastomosis.
- Intermittent suturing of the anterior wall of the anastomosis.
- In the presence of ectopic vascular compression, the vessel is placed dorsal to the renal pelvic ureter for plication, the pneumoperitoneal pressure is reduced, and it is confirmed that there is no active bleeding in the operative field, and one retroperitoneal drain is left in place via a trocar needle on the iliac crest to close the incision.
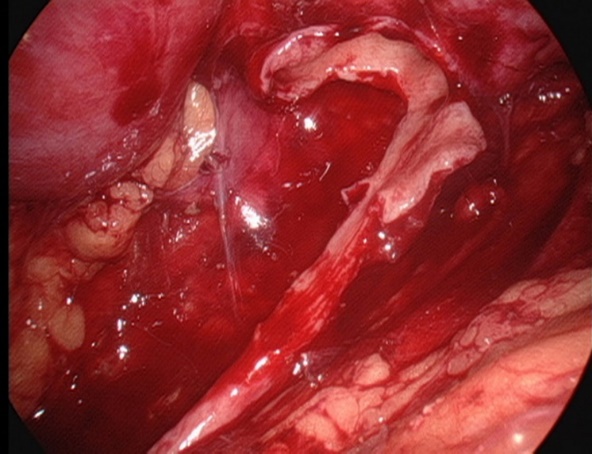
Figure 26 Keep the medial part of the pelvis incompletely detached and still connected to the ureter
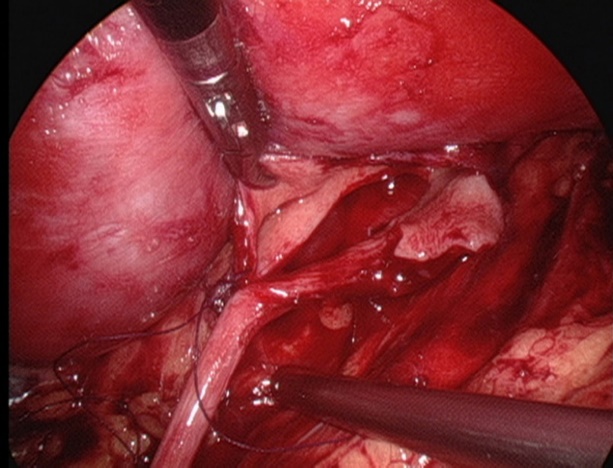
Figure 27 Suture the lowest point of ureter
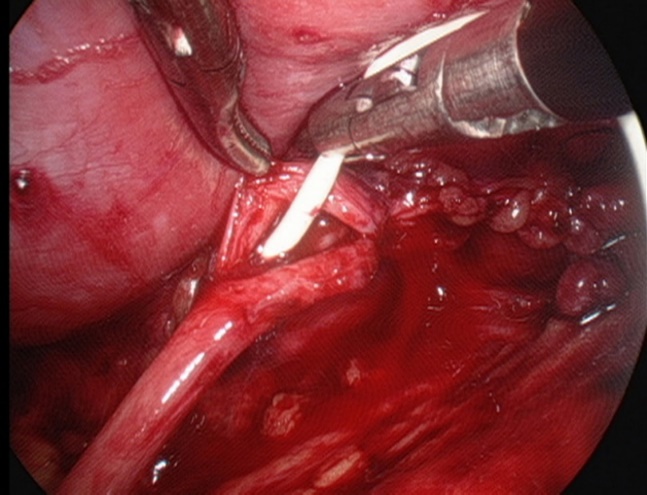
Figure 28 Placement of a double-J stent
Transperitoneal Approach
- After establishing a normal Trocar access, the pneumoperitoneal pressure is maintained at 8–14 mmHg, with a mean of 10 mmHg.
- Open the lateral peritoneum along the lateral side of the paracolic sulcus to fully free the colon, push the colon medially to identify the gonadal vein and ureter. For left-sided pyeloplasty, open the avascular area along the mesenteric space, and after freeing the perirenal fat, reveal the renal pelvis and upper ureter.
- The renal pelvis is fully freed from the hilar vessels using downward retraction and blunt separation. Then freed the pelvis dorsally to expand the renal pelvis and observed for the presence of vagal vessels crossing the ureteropelvic junction to clarify the site of stenosis.
- The superior horn of the renal pelvis is suspended from the abdominal wall with 2-0 mousse wire. Then cut the renal pelvis from posterior to inferior to superior to form a funnel shape. Then cut the ureter longitudinally to cross the stenosis by 1 to 2 cm.
- Suture the renal pelvis flap with the lowest point of ureter with 5-0 absorbable thread.
- Separating the ureter at approximately 0.5 cm distal to the stenotic segment and further completing the renal pelvis cut to remove the UPJ stenotic segment and partially dilated renal pelvis
- Sequential suturing of the posterior wall of the anastomosis with 1 locking margin every 2 stitches.
- Continue suturing the excess renal pelvis flap opening without cutting the sutures.
- Placement of a double-J stent.
- Continuous suturing of the anterior wall of the anastomosis, careful and thorough hemostasis, and warm saline irrigation of the operative field.
- Interrupted suturing of the lateral peritoneum or mesenteric gap.
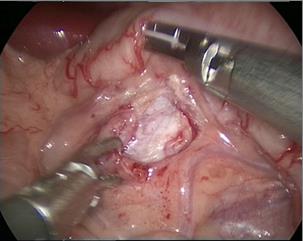
Figure 29 The transmesenteric approach
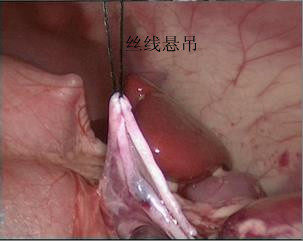
Figure 30 The superior horn of the renal pelvis is suspended
Robotic-Assisted Laparoscopic Pyeloplasty
- For left side cases, the transmesenteric approach was adopted while the dilated renal pelvis was located at the inside of the descending colon. For right side cases, we selected the paracolic sulci approach.
- Then we carefully dissected the proximal ureter and renal pelvis while preserving the ureteral blood supply.
- The pelvis was cut above the obstruction tissue and trimmed by a percutaneous hitch stich to stabilize it and facilitated the anastomosis.
- After spatulated the distal ureter after excision of the obstruction segment, we sutured the lowest point of the aperistaltic ureteral segment and the pelvis end with a running 6-0 PDS-II.
- Then the posterior wall of the ureter was closed through continuous suture. Before the anterior anastomoses were started with a second running 6-0 PDS II suture, a double-J ureteral stent (COOK, USI-512, Ireland) was placed antegrade.
- At last, we closed the mesentery or peritoneum with a 5-0 absorbing suture.
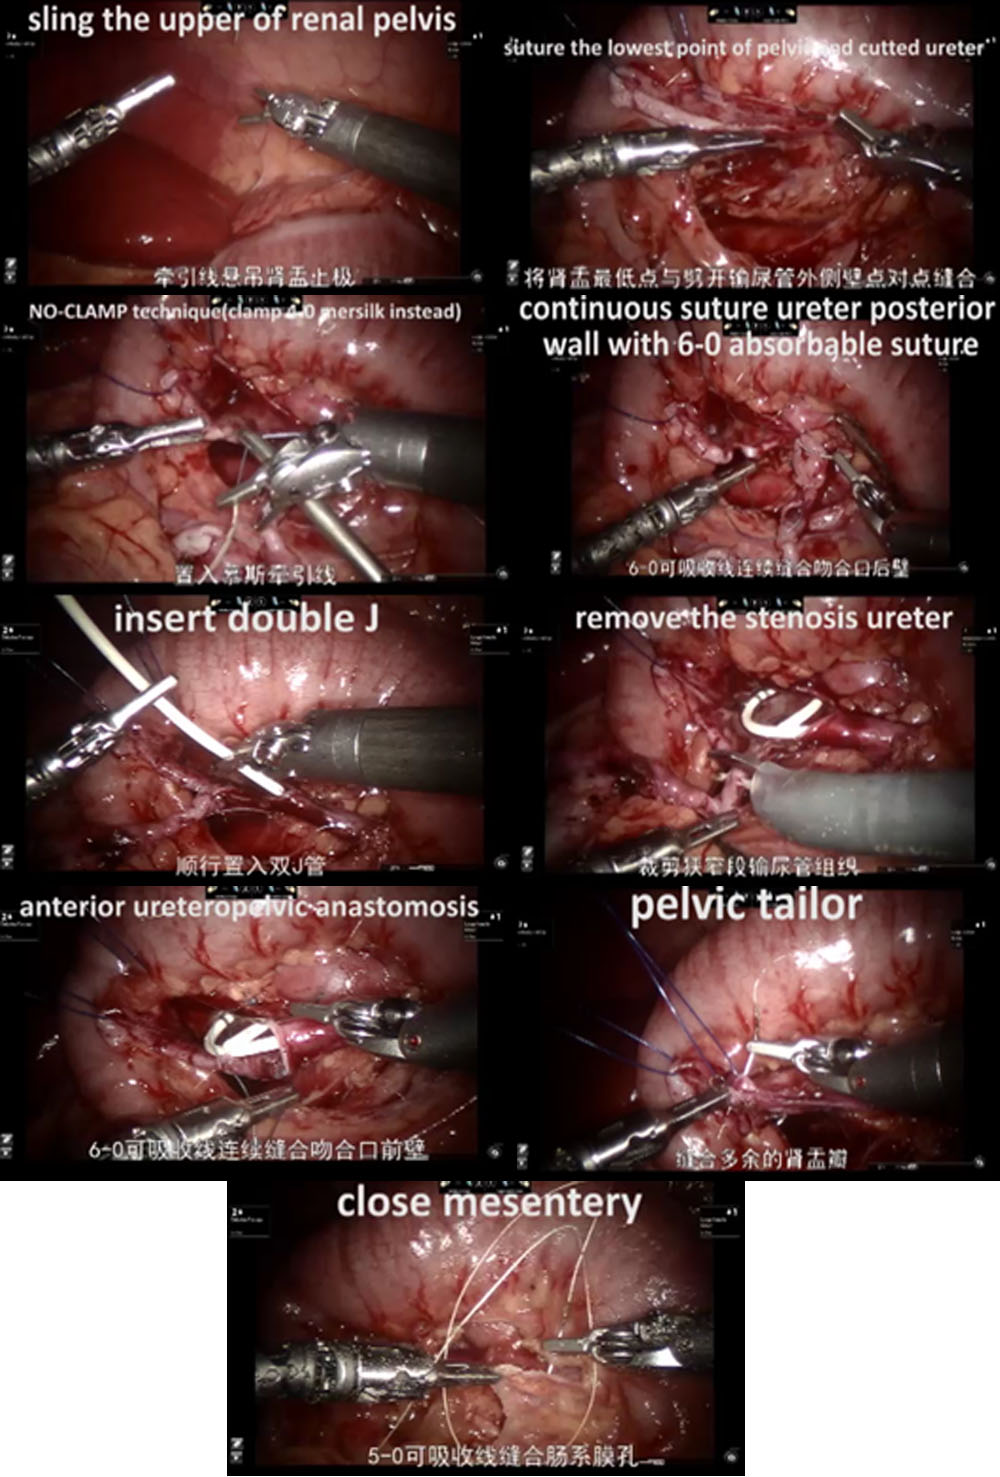
Figure 31 The procedure of RALP
Ureteral Reimplantation
Ureteral reimplantation is the gold treatment of vesicoureteral reflux and ureteral stricture. Traditionally, this procedure has been done using an open access. Many different techniques can be used: intravesical Cohen reimplantaion, transvesical Polino-Leadbetter reimplantaion, extravesical Lich-Gregoir reimplantion. All technique could be done through laparoscopic, pneumovesical laparoscopic or robotic approach. Here we introduce pneumovesical laparoscopic Cohen’s Reimplantation Procedure (transverse submucosal bladder tunnel uretero-vesical anastomosis) and extravesical Lich-Gregoir reimplantation.
Pneumovesical Establishment
- The cystoscope was placed through the urethra. Then CO2 gas was injected through the cystoscope until the bladder was dilated to the umbilical level. Full bladder traction was done percutaneously under cystoscopic observation.Fixed the top of the filled bladder at the subumbilical position in the midline of the abdomen, the skin was cut at the lower edge of the traction line. Trocar was punctured immediately after the traction fixed. A 3-5 mm operating Trocar was placed on the left and right sides, respectively. Then the cystoscope was withdrawn. CO2 gas was injected via the ophthalmoscopic Trocar.
- Locating the bilateral ureteral orifices.
- One stitch of traction is sutured at the ureteral opening on the affected side. Cut the mucosa along the ureteral orifice with an electric hook loop. Free the ureter from the inner segment of the bladder wall by the electric knife or ultrasonic knife closely. The free ureter is dragged into the bladder for about 5.0 cm to the dilated segment of the ureter that can be drawn tension-free to the top of the contralateral ureteral orifice. In male patient, we must protect the vas deferens when freeing the ureter.
- Cut a small opening at the junction of the distal dilated segment of the ureter and the stenotic segment to drain the fluid. For the ureteral diameter greater than 12 mm, folding or cutting of the dilated ureter should be performed.
- Cut the mucosal layer at about 2.0 cm above the orifice of the contralateral ureter. Then separate the submucosal layer with scissors or vascular forceps and make a submucosal tunnel to the ureteral orifice.
- Drag the ureter to the opposite side via the submucosal tunnel, excise the stenotic lesion tissue at the ureteral opening, and fix the whole ureter to the bladder mucosa with 5-0 or 6-0 Vicryl sutures for 6-8 stitches and 2 stitches with the bladder muscle layer.
- Close the original ureteral orifice bladder muscle layer with the ureteral muscle layer with 5-0 Vicryl suture
- Leave a double-J stent through Trocar.
- Remove each Trocar, suture the subcutaneous and skin.
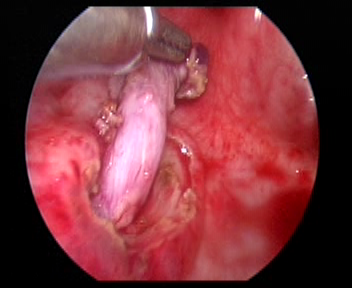
Figure 32 Free the ureter
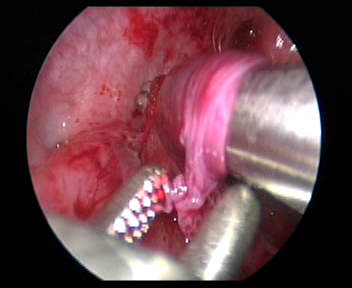
Figure 33 Make a submucosal tunnel to the ureteral orifice.
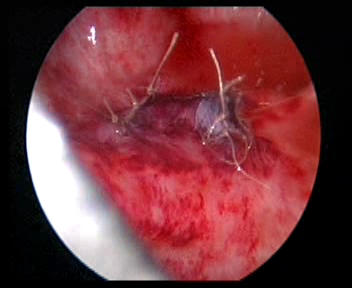
Figure 34 Close the original ureteral orifice
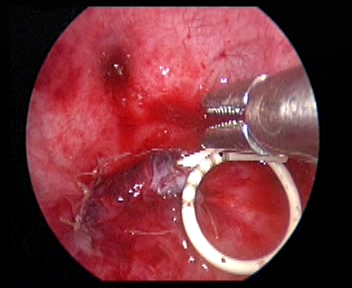
Figure 35 Leave a double-J stent
Robotic-Assisted Lich-Gregoir Reimplantation
- Open the lateral peritoneum at the pulsating external iliac artery, find the ureter that crosses the external iliac artery, and free the ureter as far as possible to the uretero-vesical junction to fully reveal the ureteral stenosis.
- Fill the bladder with 60 ml of saline to keep the bladder lightly filled. A 5 cm incision was made in the lateral posterior wall of the bladder. Then incise the bladder to the submucosa of the bladder.
- Detach the ureter at the ureterovesical junction, trim the distal ureter to normal size. Enlarge the bladder mucosal fissure at this junction. Then suture the trimmed ureter to the bladder mucosal fissure with 6/0 absorbable thread to fix it. Complete the posterior wall anastomosis and leave the double-J stent in place to continue to complete the anterior wall of the anastomosis (For the reflux cases, insert the double-J stent before surgery).
- Absorbable sutures were used to close the peritoneum at the lateral wall of the bladder and the peritoneum around the ureter in the pelvic segment. The robotic system was removed, drainage tube was placed, and the skin incision was sutured.
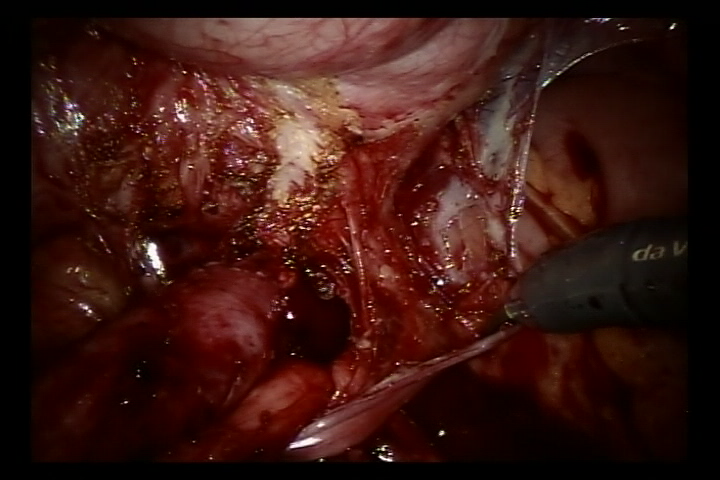
Figure 36 Free the ureter
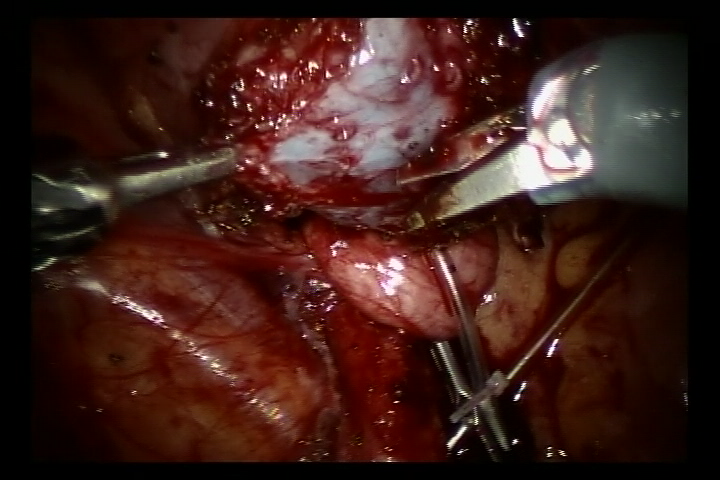
Figure 37 Incise the bladder to the submucosa of the bladder
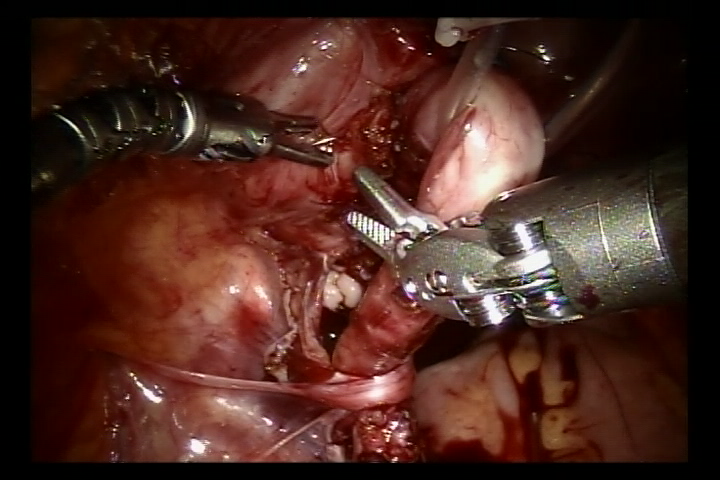
Figure 38 Suture both sides of the pulpy muscle layer to form a submucosal tunnel
Bladder Rhabdomyosarcoma
Rhabdomyosarcoma (RMS) is the most common soft tissue sarcoma in children. Radical or partial cystectomy should be performed to remove tumor. Here we introduce our experience of robotic-assisted radical cystectomy with sigmoid orthotopic neobladder reconstruction with bilateral ureteral reimplantation (Politano-Leadbetter technique).
- A 10-mm port was placed at about 6 cm to the symphysis pubis for the camera. Two 8-mm robotic ports for the #1and #2 robotic arm were placed 6 cm to the camera port at the midclavicular line above the anterior superior spine. Two 5-mm assistant ports were placed at the right midclavicular line near under the costal margin.
- After the careful and accurate radical resection of the tumor bladder
-
and peripheral pelvis lymph nodes, we captured about 20 cm sigmoid colon and detubularized it into a spheric shape to reconstruct the neobladder that can eventually
- accommodate about 100 mL.
- Then we conducted the antireflux reimplantation (Politano-Leadbetter technique) with bilateral ureter through the submucosal tunnel
- At last, we took the specimen through the groin incision (bikini line).
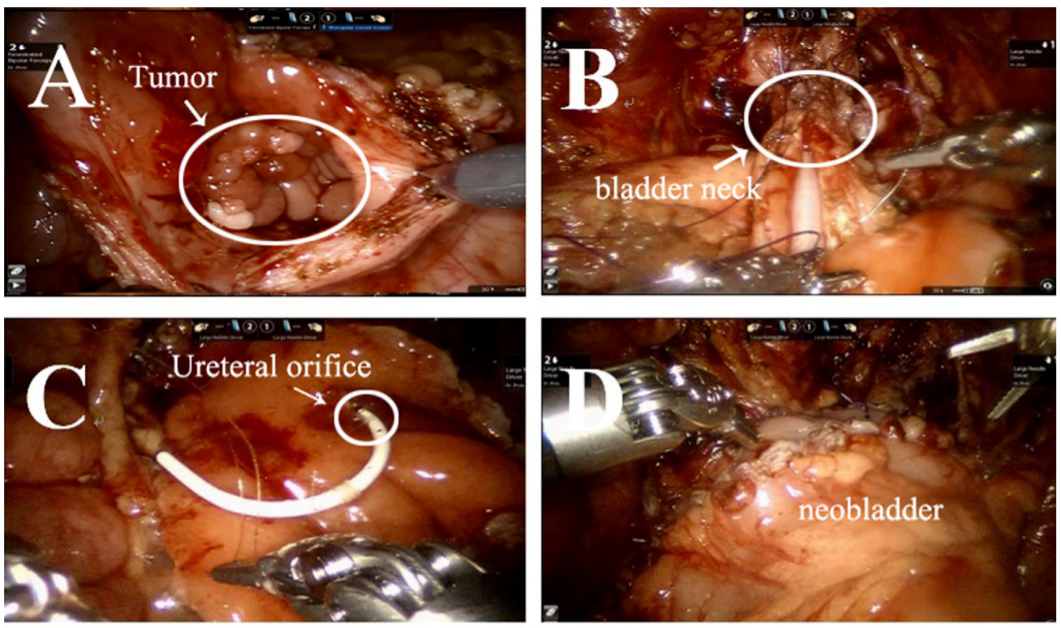
Figure 39 The procedure of radical cystectomy with sigmoid orthotopic neobladder reconstruction with bilateral ureteral reimplantation
Other Applications
We have also performed robotic-assisted laparoscopic for nephrectomy or nephron sparing surgery for Wilms tumor, neuroblastoma resection prostatic capsulotomy and vas deferens reconstruction. For the complex hydronephrosis cases, Yang-Monti technique, appendiceal or oral mucosa ureter replacement are conducted. With the improving of instrument and technology, the future of minimally invasive surgery is hopeful.
Considerations
For reimplantation, free the ureter of sufficient length to adequately remove the ureteral lesion and ensure a tension-free anastomosis as much as possible. Due to the lack of force feedback in robotic-assisted system, excessive clamping of ureteral tissues should be avoided, and the surrounding ureteral tissues and blood supply should be preserved. We should pay attention to maintaining symmetrical sutures when performing ureteral bladder reimplantation to prevent ureteral torsion or angulation.
If the diameter of the ureter exceeds 1.5 cm in the voided state, it should be cut, otherwise it is difficult to establish an anti-reflux structure. The length of the submucosal tunnel of the bladder should be about 5 times the diameter of the ureter to maintain a relatively fixed forceps as support to obtain a satisfactory anti-reflux effect.
For pyeloplasty, the renal pelvis should be freed more fully, which can reduce the tension of the anastomosis, and the upper ureter should be freed as little as possible to minimize the direct clamping of the ureter by robotic system instruments and protect the ureteral blood supply. The first suture is most important. If the pelvic ureter is completely separated and then anastomosed, distortion of the ureter is likely to occur. Therefore, the direction of the renal axis should be accurately judged intraoperatively. and the lower pelvic flap. The lowest point of the renal pelvis should be anastomosed with the lateral wall of the longitudinally split ureter.
References
- WE. KJ. The evolution of laparoscopy and the revolution in surgery in the decade of the. 1990; 2 (4): 51.
- Cortesi N, Ferrari P, Zambarda E, Manenti A, Baldini A, Pignatti Morano F. Diagnosis of Bilateral Abdominal Cryptorchidism by Laparoscopy. Endoscopy 1976; 08 (01): 33–34. DOI: 10.1055/s-0028-1098372.
- Peters CA, Schlussel RN, Retik AB. Pediatric Laparoscopic Dismembered Pyeloplasty. J Urol 1995; 53 (6): 1962–1965. DOI: 10.1016/S0022-5347(01)67378-6.
- Blanco FC, Kane TD. Single-Port Laparoscopic Surgery in Children: Concept and Controversies of the New Technique. Minim Invasive Surg 2012; 2012 (232347): 1–5. DOI: 10.1155/2012/232347.
- Meininger DD, Byhahn C, Heller K, Gutt CN, Westphal K. Totally endoscopic Nissen fundoplication with a robotic system in a child. Surg Endosc 2001; 15 (11): 1360–1360. DOI: 10.1007/s00464-001-4200-3.
- OLSEN LH, JORGENSEN TM. Computer Assisted Pyeloplasty In Children: The Retroperitoneal Approach. J Urol 2004; 171 (6 Part 2): 2629–2631. DOI: 10.1097/01.ju.0000110655.38368.56.
- ATUG FATIH, WOODS MICHAEL, BURGESS SCOTTV, CASTLE ERIKP, THOMAS RAJU. Robotic Assisted Laparoscopic Pyeloplasty In Children. J Urol 2005; 174 (4 Part 1): 1440–1442. DOI: 10.1097/01.ju.0000173131.64558.c9.
- Lee RS, Retik AB, Borer JG, Peters CA. Pediatric Robot Assisted Laparoscopic Dismembered Pyeloplasty: Comparison With a Cohort of Open Surgery. Yearbook of Urology 2006; 2006 (2): 273–274. DOI: 10.1016/s0084-4071(08)70423-8.
- Hollis MV, Cho PS, Yu RN. Robot-Assisted Laparoscopic Pyeloplasty. Pediatric Robotic Urology 2015; 1: 109–121. DOI: 10.1007/978-1-60327-422-7_8.
- Andolfi C, Rodríguez VM, Galansky L, Gundeti MS. Infant Robot-assisted Laparoscopic Pyeloplasty: Outcomes at a Single Institution, and Tips for Safety and Success. Eur Urol 2021; 80 (5): 621–631. DOI: 10.1016/j.eururo.2021.06.019.
- Higganbotham C, Cook G, Rensing A. Bilateral Robot-Assisted Laparoscopic Orchiopexy for Undescended Testes. Urology 2021; 148 (314): 314. DOI: 10.1016/j.urology.2020.10.044.
- Rao PP. Robotic surgery: new robots and finally some real competition! World J Urol 2018; 36 (4): 537–541. DOI: 10.1007/s00345-018-2213-y.
- Peters BS, Armijo PR, Krause C, Choudhury SA, Oleynikov D. Review of emerging surgical robotic technology. Surg Endosc 2018; 32 (4): 1636–1655. DOI: 10.1007/s00464-018-6079-2.
Last updated: 2025-09-25 12:10